by Jayme Radomski | Jan 8, 2020 | Clutter, Organizing, Saving Time

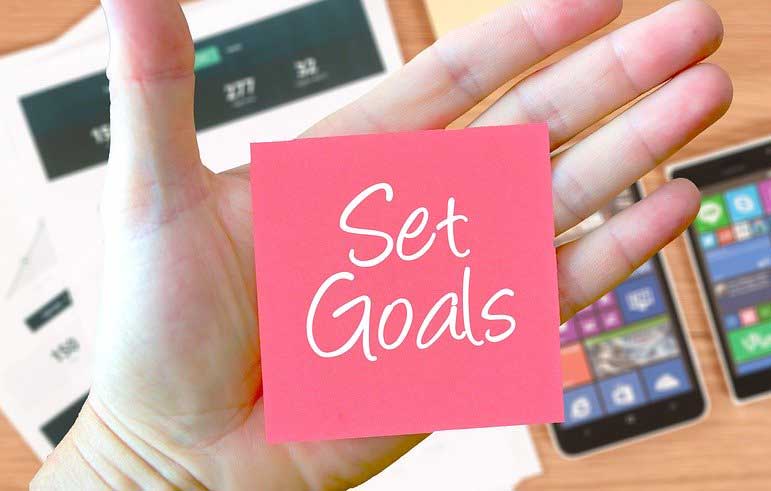
Setting Realistic Organizing Goals
In this new year and new decade, I want to share with you some simple ideas on how to set goals to be more organized in 2020. Being organized is a journey. To expect to become completely organized this month if you have not been organized in the past year or decade is unrealistic. Setting small weekly goals to get your home organized will be more manageable, leave you time to continue with your daily activities, and allow you to celebrate many small victories.
5 W’s of Goal Setting
Take some time to think about the benefits of being organized, and what that will look and feel like for you. Start a journal or notebook to track your progress, motivations, slowdowns and feelings. A good guideline for setting goals is to look at the five W’s.
- Why is it important for you to become and stay organized? How will this help you to be the best you?
- Where do you think you need the most organization? Is it an area of your home? Is it an area of your office? Would having more structure to your schedule be beneficial?
- When will you accomplish your goals? When will you make time to work on your goals? Set a realistic time frame to meet your goals. Getting organized is a journey, not a one-stop trip. Plan time in your days and your weeks to accomplish small goals.
- Who will be affected by being organized? Obviously you will directly benefit. Think about the other people who will positively benefit from organization and structure. Your boss will feel the benefits of your workspace being organized and your schedule more structured. Family members will see the benefits of an organized home and feel the benefits of you being less stressed. Relationships will flourish when this area of your life is under control.
- What do you want to organize? Look at the big picture and break it down into small steps and then into even smaller steps. If you want your entire home, office, storage unit, garage, attic and vacation home organized, you will need to set goals in each area. Furthermore, goals will need to be set for each room, and then even smaller goals will need to be set for each file, drawer, closet, box and bin. For example, if your goal is an organized bedroom, you will want to break your bedroom down into smaller categories. These smaller categories could include closet, dresser, under bed storage, bathroom and linen closet. Each of these areas can be broken down into very small projects that take just minutes. Your dresser can be separated into smaller categories such as undergarments, socks, pajamas, swimwear, t-shirts and accessories. A similar method can be applied to other areas.
Goal Setting Basics
- Specific
Be specific about your goals. Goals should be specific to what you really want and need to be organized. Go further than general statements like “I am going to get organized” and “I am going to organized my whole house.” Specific goals will go deep and detail areas of your home, and further into rooms, and then into drawers, closets, categories, boxes and bins.A calendar is a great way to break down your project into small specific goals. Each month you will have a large goal. The large goal can be broken down into smaller weekly goals, and then even further into very manageable daily goals. The smaller goals should be focused on achieving a larger goal to ensure a part of the project gets completed. If you are working on basement organizing, the smaller goals should lead you to accomplishing that larger goal.
- Measurable
You will want to have a way to measure your progress. Progress with getting organized can be a photo to visually remind you of what you have accomplished. It will help to know where you started and how far you have come. A simple check list or spreadsheet can also help you mark off your progress.
- Attainable
Set goals that you can achieve. Success meeting your goals will motivate you to keep going. Setting goals that will only take minutes a day will be more attainable than goals that take many hours out of your week. An attainable goal for you may be cleaning and organizing a refrigerator shelf, not the entire refrigerator. It will always feel better to move on to the next small goal when you have time than to set goals so large you cannot complete even one.
- Realistic
Be realistic about your time, lifestyle and goals. If your weekends are packed with running to activities and enjoying time with family and friends, you may only have a few minutes to work on your goals. Don’t plan to organize your entire office on Saturday if you have a full schedule. That will only lead to failure and frustration.
- Timely
Set timely organizing goals. Making progress will keep you motivated. If you plan for an organizing project to go on too long, you may lose focus. Planning your goals to be accomplished in a timely manner will help you and others see and learn that progress has happened and keep you going.
There are many monthly and daily organizing calendars available online. These can provide a great guide for you to plan your organizing journey. Top Shelf Home Organizing would love to help you on your journey. Jayme would be happy to help you set your organizing goals, and help you achieve your organizing goals.
by Jayme Radomski | Dec 6, 2019 | Clutter, Relationships, Holidays
 Year after year, you want to get all your holiday stuff organized completely. At the end of the holidays you are tired, life gets back to usual busyness and holiday items quickly get stashed away. Here are Top Shelf Home Organizing’s tips to get your holiday items organized and packed away properly. Organizing holiday items really is not different than organizing any other category of items in your life. Gather, sort, purge and store.
1. Gather
Retrieve all items from storage including the attic, basement and storage unit. Gather all items that were put on display this year. Unwrap, touch and hold each item.
2. Sort
Sort each piece into categories:
- Tree Décor
- Interior décor by room
- Exterior décor
- Holiday cards received
- Food storage
- Other
Within each of these categories, you will sub-sort items as:
- Used this year and will use again
- Used this year, but will not use again
- Did not use this year, but will use next year
- Did not use this year and I never want to use these (this includes defective lights and broken items)
- Do not use these and will not use next year, but they are family heirlooms, I must keep these items forever
3. Purge
Remove the items you have classified as “Did not use this year and I never want to use these,” and “Used this year, but will not use again.” These items can be donated, offered to friends and family or potentially recycled and disposed of.
4. Store
After the sort is done, plan for storage. Create ample space in one location to store holiday items. This is when you purchase storage containers and shelving if needed. Clear, small- to medium-sized containers that stack and nest well, work great for these delicate items. A shelf dedicated to holiday décor keeps these items organized and together. These items are readily available at most home goods stores immediately after the holidays.
Keep track of your categories created. Items should be stored and labeled in the same manner to keep next year’s decorating as simple and organized as possible. Holiday lights can be neatly wrapped individually for ease of install next year. Ornaments are carefully wrapped and stored. Carefully pack up the family heirlooms that you want to keep, but will not necessarily display often.
Top Shelf home Organizing loves to organize holiday décor. Contact Jayme to see how Top Shelf can help.
by Jayme Radomski | Nov 5, 2019 | Relationships, Holidays
Getting organized before the holidays can save your sanity and protect your pocket book. Having a holiday plan will keep you in check, and prevent impulse purchases that are so easy to make during this magical time of year.
 Here are some ideas on keeping the holidays organized:
- Budget
Set a realistic budget for the holidays. Think beyond the gift budget, and include extra events and shows you may attend, additional dining out, entertaining, wardrobe purchases for events, and activities while you and the family are on holiday break.
- Decorations
This year, you get a free pass for decorating early because you are getting your holiday decorations organized. Getting your holiday décor out and organized will prevent you from purchasing new, unnecessary decorations.Follow these steps to effectively organize your holiday décor:
-
- Step 1: Remove all holiday décor from storage
- Step 2: Sort and categorize into: lights, tree ornaments, exterior decorations and interior decorations by room.
- Step 3: Access what you have, what you love, what you don’t like, and what you need to keep, but don’t want to display
- Step 4: Donate or sell what you don’t want
- Step 5: Organize and store what you need to keep, but don’t want to display. This includes items such as family heirlooms, kids’ homemade décor, etc.
- Step 6: Check that lights work properly. Recycle those that do not work or will not be used.
- Step 7: Take time to decorate carefully selecting the items you love that will serve your family well. Remove the rest.
- Gifts
Create a list of people you want to buy gifts for (friends, family, teachers, service providers, etc.). Consider gifting experiences, memberships, services, outings/dates or consumables. Limit the physical gifts as they can be costly and under appreciated.
- Sell
Do a quick inventory of items in your home that you can remove before the holidays. Sets of toys sell well online before the holidays. So you may consider selling those expensive sets of toys that your kids no longer have an interest in.This also a good time to resale your clothes online. Poshmark, ThredUp or local consignment shops are great places to get a little return on your wardrobe.
If pre-holiday organizing has you overwhelmed, a professional organizer can help. See if Top Shelf Home Organizing can help you on your journey. Contact Jayme to schedule a consult or chat about organizing.
by Jayme Radomski | Oct 10, 2019 | Cooking & Kitchen, Organizing, Pantry
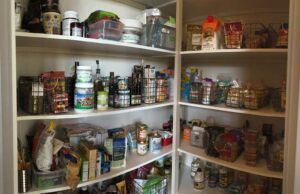 Autumn is a great time to clear out the pantry and make room for fall foods, baking supplies and entertainment planning items. A fresh pantry will reignite your love for cooking and give your kitchen a little refresh. Clearing out and inventorying the food in your pantry can help with your meal planning and grocery shopping. We have put together four simple, practical tips for getting your pantry organized this fall.
- Remove all food and other items from your pantry
You will also want to gather food you have stored in other areas of your home. While the pantry is empty, it’s a great time to thoroughly clean all surfaces for a fresh start. Ahead of this project, consider purchasing the food you typically keep on hand. This is an important part of allocating adequate space in your pantry.
- Sort and categorize your food
During this process, you can categorize the food on your kitchen countertops and dining room table. Remove and dispose of expired food. Relocate nonfood items, especially if your pantry space is limited to another storage area of your kitchen or home. Categorize your food into snacks, canned goods, grains, pastas, nuts & seeds, etc.Strategize where food will go in your pantry based on the categories, quantity of food and convenience. You will want frequently used items within reach. Occasionally used items can go on higher, less convenient shelves. You may or may not want kids snack items within their reach.
- Purchase storage products
If you need them, explore and purchase storage containers that will work well for your pantry. Clear bins work great for corralling snack bars, chips and items that come in soft packaging. If you tend to purchase bulk grains, nuts, etc., you may want to consider tight sealing, clear containers for storage of these items that do not come with their own packaging. Measure your space carefully prior to buying storage items, as you want them to fit well in the space they will be used.Also be careful not to overcomplicate containers. Many times, placing pre-packaged food into containers may be more work than needed. Consider food rotation when deciding on containers. You will want to make sure the older food gets used first. Coordinating containers can make the pantry aesthetically pleasing.I also suggest labels for all containers. This will help ensure everyone knows where to return food to the pantry. Adding pull out drawers and baskets are nice for deep shelves to make all items visible and accessible. You can utilize the pantry doors for storage of lightweight, narrow items.
- Return food to pantry
Returning food to the pantry is fun. This is where you get to utilize any new storage products, decide on the best location for the food, and label the bins and containers. Remember that food goes with food in the pantry. Non-food items go with non-food items, and may need to be stored in other areas. The slow cooker you use two times per year, the holiday candles, or kids craft supplies may not have a home in your pantry, especially if you are low on space. Limit food storage in other areas such as the hall closet, bathroom, garage, and basement unless necessary.
Bonus Step: Create a meal plan that utilizes the food you have in your pantry. This will save you cash on your next shopping trip.
Pantry organizing can be a fun and easy organizing project that is good to do with the season changes. For a kick start on organizing your pantry, see if Top Shelf Home Organizing can help you. Contact Jayme for advice. We love what a fresh pantry will do for you.
by Jayme Radomski | Sep 10, 2019 | Office, Productivity
 We have researched tips and tricks on how to create and maintain an organized office to increase your productivity. An organized office includes a system to manage information and an environment that encourages productivity. You can create a comfortable and organized workspace to make your work time more productive and enjoyable. Here are some of our favorite tips.
Workspace
Your work environment is so important to your productivity. How the space feels to you and where items are located affect the quality of your workspace.
Lighting
Consider a well-lit workspace. If natural light is not an option, look for lighting that mimics that of natural light. Be generous on the quantity and location of light fixtures. Also consider the type of light bulbs you install. While fluorescent and LED light bulbs are more economical, those sensitive to this lighting may consider traditional incandescent lighting or warm colored LED bulbs.
Desk Location
Place your desk or work surface in an area that embraces productivity instead of distractions. You may not want to sit where passersby are tempted to stop to chat, or where noises are a distraction. If you have a home office, your most productive place is likely not in the kids’ playroom. Instead consider a room that is relatively far away from the family action.
Office Equipment
Have your work equipment in a location that is convenient, but not necessarily on your desktop. Equipment that is used frequently throughout the day should be placed near your workspace. Computer and phone are located on your desk. If you do a lot of video conferencing, your camera should be on your desk ready to go. If you do a lot of scanning, keep your scanner near your desk. Needing to run to another room or another floor to retrieve a print out will have an impact on your productivity. Other frequently used equipment should be placed on a separate piece of furniture nearby, or where it can be easily accessed.
Storage
If you are a visual person and tend to create piles on your desktop so that you know right where things are, consider open shelving for your files. If you feel most productive when things are tucked away out of site, then a file cabinet system will work well for you. Either system should be well-labeled so that everything has a place and retrieval of information is easy. Other office basics are important to your workspace, as well. These basics include a good sized trash can and recycle container, a supportive chair, right-sized desk or work surface, and containers to corral office supplies such as pens, pencils, tape, stapler, paperclips and notepads.
Information Management
Information management, traditionally referred to as paper management, is best completed by a structured system in place to receive, store and reference all the information that comes to you. A structured information management system works if your information is primarily in paper form, digital form or a combination. Similar management systems are set up to manage paper and digital information. Keep in mind that you want to have current projects and information accessible, while past projects and information can be filed away. This will free up space for what you are working on now, but you will still have past projects organized and accessible for future reference.
When you receive information, have an initial place for this information to go. There are five categories for this initial storage system. This system works for emails, physical papers and digital information. This initial storage system is designed to hold information for a few days to up to a month depending on the pace of your work.
- Follow Up
This file is where you place information that needs to be addressed in the near term. This file is addressed during a scheduled time you allocated to follow up on these items. You may need to allow for this time daily, weekly or even monthly. Sub files can be created based on the timeframe required for each action.
- To Do
This file is very similar to your to-do list. This is where you place items that have a deadline and cannot be overlooked. This may include membership renewals, client follow ups, etc. This file may also include emails and publications that you wish to unsubscribe from. This file may also be called “Waiting on Response,” if your workflow is dependent on others to respond or complete tasks.
- To Read
This file is where you place items that you intend to read and absorb at a later time. These items do not necessarily have a deadline, but instead are items of interest to you. This file is designed to prevent you from getting distracted by an interesting article when you are in the process of completing other tasks.
- To Pay
This is the file where you place items that have to be paid by a certain date. This can include vendor invoices, utility bills, credit card statements, etc. This file is kept separate from the to-do file since it involves money, and timely payment is important due to budgets and due dates.
- To File
A file designated to items that need to be filed is also important. This is where you place items that have been addressed, but eventually need to be filed for long-term storage. This includes physical files, digital files and emails.
- Long-term
A long-term file is where information that needs to be saved can be archived. When you receive an email or piece of mail that can go directly into longer term filing, set up a system that does this for you automatically. Emails can be automatically labeled and filed without any additional work on your part.
Be Consistent
Setting up a consistent filing system for the long-term files is very important. For example, if you have file folder on your hard drive or in the cloud for storing client invoices, you will likely have an email file for the same client. Naming these similar files in a consistent way will make retrieving information much more efficient. If you have an invoice from Top Shelf Home Organizing, you might consider creating a file titled “Top Shelf Home Organizing” on both your drive and your email. If you identify your clients with a contract number, consider utilizing the contract number in your file naming convention. The important point here is to keep the naming convention consistent across physical files, digital files and email files.
IF setting up and/or maintaining a productive office environment and structured filing system is overwhelming, consider having an office assistant or a professional organizer help you. See if Top Shelf Home Organizing can help you get your next organizing project started and completed. Contact Jayme to schedule a consult or chat about organizing.