by Jayme Radomski | Dec 4, 2020 | Clutter, Organizing
 Winters are long and hard in the Midwest. So how about tackling some quick and simple organizing projects on the long, cold days to beat the winter blues? We put together a quick list of projects you can have ready to blast through on the next snow day.
Simple organizing rules apply to anything you are organizing: gather, sort, purge, organize and label. Have a rag and cleaner ready to wipe down the area after it is emptied out before you organize and label. Sort by category to get a clear understanding of what you have and what you can purge. When organizing and labeling, use clear containers with labels and keep items in their categories. This will help keep the area organized and inventory under control.
1. Craft closet
Gather all craft items into one area. Sort the items by category. Purge items that are not useful (scraps, dried products, dull scissors). Organize the items and use fun labels to inspire creativity.
2. Game closet
Pull all games out of the area. Reassemble games with loose pieces and cards. Give a little TLC to damaged boxes with some strong packing tape. Sort games into age categories. Remove any games that no longer interest your family or games they have outgrown. Organize the games by category and include labels for simple replacement.
3. Pantry
This is a great project for any season. Remove all items from the pantry. Sort by category. Remove any old, spoiled, or expired food. Donate food that is unopened, not expired, but not wanted. Find a new home for any non-food and non-kitchen items. Keep all food in the same pantry or area of your kitchen. Categorize your food into grains, pasta, soup, fruit, vegetables, snacks, lunch items, etc. Utilize clear bins with labels to help keep food in their categories and help you identify items you are getting low on.
4. Storage Containers
Gather all storage containers and lids. Pair up the containers with lids. Recycle containers or lids that don’t have a partner. Organize containers by size and nest them together if possible. Keep a reasonable number of containers. Excess containers make staying organized a challenge. Place storage containers in an easy to reach location and label the shelves. Having to bend over or reach too high is an invitation for this category to become messy again.
5. Sock Drawer
Socks are a quick and satisfying project. Like any other category, you’ll gather all socks and put together pairs. Make sure you have your socks from the laundry hamper washed and included in this step. You may choose to fold or ball them together or roll them up. Remove the socks that don’t have a partner, have holes, have failed elastic or the socks that you don’t like to wear.
6. Refrigerator
Place all items from the refrigerator onto your countertop. Wipe down the shelves, drawers, gaskets, and door. Toss food that is expired, spoiled, and unwanted. Categorize the food into categories such as fruit, vegetable, dairy, condiments, lunch, leftovers, etc. Deep, clear bins with labels may help keep items in their categories. Place items back into the fridge in their categories. You may need to adjust some shelves based on the size of your items.
7. Freezer
Organizing the freezer is just like organizing your refrigerator. Empty the freezer and wipe down all the surfaces. You may need to complete a quick defrost. Categorize the food items from the freezer into categories such as vegetables, fruit, desserts, prepared meals, meat, etc. If you have a large freezer, you may want to write down an inventory. A formal inventory will help you with meal planning and inventory control. Toss any food items that are expired or have gone bad. Consider clear freezer bins for the loose items. When returning the food to the freezer, keep the older items closer to the front and new items to the back for first-in, first-out inventory control.
8. Winter gear
Gather and sort all winter gear by the person and then by category (glove, hats, scarves, face masks, etc.). Inspect for holes, tears, wear, and damage. Donate items that are still functional, but may no longer fit your size or your style. Use bins or an over-the-door, clear organizer to keep everyone’s gear organized by person and category.
9. Photos
Grab a box of photos from the basement or a file from your computer. Sort through the photos and place them into chronological order. Remove any photos or photo files that are duplicates or don’t display a picture you want to keep. Tag people in the photos for future reference. This can be done with a photo-friendly pen on the back of physical photos. Use index cards or subfolders to identify special events within the photo box or file folder. Clearly label the photo box or file folder with the date range of the photos and any major events that are included.
10. Books
There are so many ways to organize books. Keep this task simple by gathering all your books into one area. Categorize your books into categories that you would use to retrieve them (cookbooks, reference books, professional development books, mystery books, children’s books, etc.). Donate books that no longer interest you. Place books by category to an area where you use them or on a central bookshelf. Use labels, if it will help family members remember where to replace books when they are done reading them.
11. Spice cabinet
Gather all the spices from the spice cabinet and other areas of the kitchen. Categorize the spices by name. Toss spices that are old. Many spices now have an expiration date, or you can use the one-year rule of thumb. Place spices back into the cabinet in alphabetical order, reserving the front and center for the few spices (and seasonings) you use most frequently such as salt, pepper, cinnamon, etc. You may want to consider a riser or bins to help keep spices organized and visible. Labels can also help quickly identify if a spice is in stock.
12. Linen closet
Gather and sort all items of the linen closet into categories. Pair down and donate excess items. Remove items that are cluttering up space such as seasonal items and items with limited use (beach towels, humidifiers, extra hair dryers). Neatly fold items and use clear bins for toiletries and other loose items. Label shelves for easy retrieval and replacement.
13. Office supplies
Gather and sort all office and school supplies in one central area. Use clear bins and containers to organize items by category. Store all the items in one common area so family members know where to go for supplies, know where to replace them when done, and to keep a good inventory. Be sure to label all categories.
14. Media cabinet
Tackle your media cabinet by removing all items and wiping down all surfaces. Straighten and organize cords and cables. Categorize all movies and music CDs if you still have physical media. Gather gaming devices and gadgets, and place them into a bin. Place all categorized items back into the cabinet and label.
Refresh your mood and your home with these quick organizing projects. Just a little bit of organizing can take your mood a long way. Select projects that fit the time you have so you can feel accomplished and complete. Jayme at Top Shelf Home Organizing would love to guide you through your organizing journey. Let’s talk!
by Jayme Radomski | Oct 22, 2020 | Busyness, Clutter, Managing Time, Organizing, Productivity, Saving Time
 I was recently asked by an organization I belong to, to share my inspiration to start a business. I then realized what a better audience than all of you to share that inspiration with, as well.
Top Shelf Home Organizing started in 2014 after having a discussion with friends about what our dream job would be if we could do anything. After watching all their jaws drop when I said I would organize people’s closets and basements, I knew there was a need. Since then, my business has been effectively helping people organize their homes and offices, simplify their routines, and clear their schedules. I am personally involved in all projects and have six wonderful ladies that help on various projects.
We help busy families with projects that range from pantry organizing projects to full-home, plus storage units. Some individuals just need the accountability to get through an organizing project, and others need full-service help where we handle the complete organizing project.
I have always had a bit of an entrepreneurial mind. Going back to babysitting jobs, waiting tables, and working as a consulting engineer, I always tracked the time I spent on a project, the revenue each project brought in, how my job could be done more efficiently, and what types of projects brought the most value. I treated projects like my own little business.
After 15 years of professional experience working in various leadership roles, I knew it was time to do something I was passionate about. My youngest of four kids was about six months old, and I was in the thick of balancing parenting and a career. So I knew my skill set would be valuable to other busy professionals.
My favorite part of Top Shelf Home Organizing is the clients. It can be a very personal thing helping them to organize their home, basement, or closet. I often hear stories from their childhood, past careers, current life struggles, and their aspirations. It is not uncommon to get a message from a client on a Sunday afternoon asking how my kids are, how big our puppy is, or asking for a recommendation on a carpenter, decorator, or just a simple hello. Clients become friends.
If you want to learn more about Top Shelf Home Organizing or just want to chat about an organizing project you have going, you can find me at:
Phone: 262-373-9416
Email: jayme@topshelfhomeorganziing.com
Web: topshelfhomeorganizing.com
Facebook: https://www.facebook.com/topshelfhomeorganizing
Pinterest: https://www.pinterest.com/TopShelfHomeOrg/
Instagram: www.instagram.com/jaymeradomski
by Jayme Radomski | Jun 23, 2020 | Clutter, Organizing
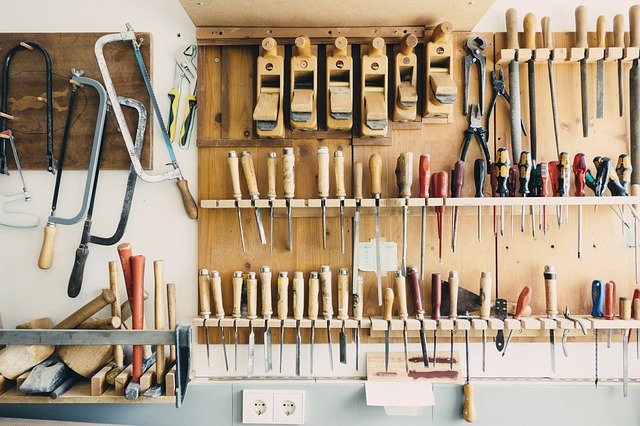
 Due to the size and location, a garage organizing project should be completed in three phases (gather and sort items, cleaning and painting, and organizing systems). Consider the garden shed to be included with the garage, as the items stored here are similar to items in your garage. Before you get started on this project, make a quick list of all the items in your garage and shed. This list can be general categories such as tools, toys, automotive supplies, lawn care, snow removal, camping, etc. Think about what you need to keep, can sell or will dispose of, and take note of these items.
Phase 1: Gather and Sort
The gather and sort phase can be a big task. Feel free to work through this phase category by category or area by area. Once you have gathered and sorted each area, identify what you will keep and group into categories. Grouping like items together will help plan for storage of these items. Selecting bins of appropriate size and purchasing storage systems will be much easier and purposeful with a plan. Remember, items that are used in the garage or outside your home get stored in the garage or shed, items that are used in your home get stored in your home. These are the steps for the gather and sort phase:
• Gather all items from garage, shed and areas that have garage related items
• Sort items into categories
• Purge items that are not needed (sell, donate or dispose)
• Organize and categorize into storage containers
• Identify storage location (garage, shed, other)
• Label
Phase 2: Cleaning and Painting
Phase 2 is where you prepare your garage for storage. You will want to remove any existing storage systems, thoroughly clean the floors and walls, and apply a fresh coat of paint to areas you want painted. A light gray, light beige or white color on the walls will make the garage feel larger and brighter. This is also time to refresh the lighting and apply a sealer to the garage floor if you desire. Here are the basic steps to this phase:
• Remove exiting storage systems
• Clean
• Paint
Phase 3: Organizing System
A well -planned organizing system for your garage will help keep your garage organized. You will need to go vertical to maximize the storage capacity. Wire shelving works great as it allows for airflow and is easily adjustable for your changing needs. Clear bins with labels allow you to see the contents of each bin. Cabinetry can make your garage visually appealing if your budget allows. Yard tools can be displayed with peg board or other tool hanging systems. What ever you choose, be sure the system is adjustable and simple. Over designing and overthinking exactly where each little tool will go may restrict your changing needs.
At Top Shelf Home Organizing we make garage organizing manageable and easy. Contact Jayme to see how we can help you get your garage organized.
by Jayme Radomski | Mar 10, 2020 | Bathroom, Clutter, Organizing
 Let’s be ruthless and get our overstuffed linen closets cleared out for real. We expect these little closets to hold too many items. To get the linen closet to a reasonable condition, lets look at the contents category by category. Empty out all the contents of this closet. Also, consider linen closet items that are not stored in the linen closet but fall into these categories. You might find these items in your bathroom, under your bed, in the kitchen, in the bedroom closet, and possibly in the car, garage, basement or attic. After we retrieve these items from around the house, sort them by category. Once we follow the guidelines below for each category, we can have fun organizing them back into the closet and labeling for continued organization.
At Top Shelf, we feel less is more and we like to keep only what we need. Here is a guideline of some typical items to consider.
- Paper Products
The linen closet is an ideal space to store extra paper products such as toilet paper and facial tissue. Keep a minimal amount of back up product in your bathroom due to limited space and the humid environment. Purchasing paper products in bulk can save money, but be aware of your storage space. You will want to avoid too much overflow into other areas of your home, unless you have ample overflow storage.
- Bath Towels
Keep two towels per person living in your house, and a couple fresh towels for guests. The extra towels can be donated to a local pet shelter.
- Hand Towels
Keep two or three hand towels per bathroom, or two hand towels per person living in your home. A couple fresh hand towels for guests is acceptable. Extra towels can be donated to a local pet shelter.
- Wash Clothes
Inventory your wash clothes and keep exactly what your family uses per week. Some people may use two wash clothes per day and others may only use a wash cloth on occasion. This category is very specific to your household. Consider donating extras to an animal shelter.
- Beach Towels
Beach towels are also unique to your household. The amount you need will depend on your lifestyle, how often you are at the beach, at the pool, on a boat or camping. You will need to figure out how many beach towels are reasonable to keep. If your kids spend their summer at camp with a swimming pool, you may want to consider a few extra towels in your inventory. If your family is more of a weekend warrior at the beach and lake, one towel per person is reasonable. These seasonal towels can be packed away and placed into storage during the winter, if they are not needed. Remember, you can always toss them in the wash when you get back from the lake or the pool so they are ready for the next day. Extra beach towels can also be donated to a local animal shelter.
- Medical Equipment
Medical equipment can take up a large section of real estate in a linen closet. Equipment only used seasonally or during an occasional illness may be stored in another location such as the basement or a larger closet. Equipment that is used regularly can remain in the linen closet as long as there is space.
- Medications
Medication’s should be gone through on a regular basis. When going through medications, gather all your medications in one location. Check the expiration dates of all medications. Also, consider medications that are not needed anymore. After the unneeded and expired are removed, you can sort the remaining into categories such as daily use, illness specific and kids’ medications. Local pharmacies and governments host collection days to safely dispose of medications.
- Toiletries and Personal Care Items
Toiletries and personal care items should be gathered and sorted. Remove the items that are expired, old and not used anymore. Place partially used products in the front of the closet to use them up first. Plan to use up your inventory of products before purchasing new items. Write down your inventory or take a photo to help resist the temptation to purchase these products before depleting what you have. These products tend to build-up, especially if you are into trying the newest products. Unopened, unexpired and unwanted products can be donated to local homeless shelters.
- Cosmetics
Before we dive into cosmetics, lets have a quick general discussion on the shelf life of them. In general, unopened cosmetics have a shelf life of two to three years. This depends on the product and where the product is stored. If a product is exposed to heat, light and humidity, even if unopened, the shelf life is reduced. A list of typical shelf lives of products is provided. However, the method of application will affect the life of the products. If you use your fingers and hands to apply products or do not keep applicators clean, the life is reduced due to the bacteria allowed to enter the product.
Application brushes: two to five years
Blush: one to two years
Eye shadow: one to two years
Eye liners and pencils: one to two years
Foundation: six to eighteen months
Lip products: one to two years
Mascara: three months
Skin care products: six months to one year
Sunscreen: one to two years
- Bed Sheets
The linen closet easily becomes a graveyard for old, unused bedding. These items should be cleared out of the closet, and grouped by set and size. Then, you can decide on what sets to keep and what sets to donate. Two sets per bed is a good rule of thumb. Keep an extra mattress protector for each size of bed, if you have young kids in the house. One set of bedding for the guest bed is plenty. If needed, you could pull a set from your regular bedding for the guest bed. Organize the sheets sets you plan to keep by bed size, and place them into a linen bag or in a labeled bin or basket.
- Non-Linen Closet Items
Any item that does not fall into the linen closet categories doesn’t need to be in the linen closet. Items often found in a linen closet include food, toys, games and clothing. These items could be placed in the kitchen or bedroom closets.
At Top Shelf, we love to see the freedom organizing a small space can bring to you and your household. Let us know how your linen closet project goes by posting photos at Top Shelf Home Organizing Facebook page. Need some guidance getting started, get in touch with Jayme.
by Jayme Radomski | Jan 8, 2020 | Clutter, Organizing, Saving Time

Setting Realistic Organizing Goals
In this new year and new decade, I want to share with you some simple ideas on how to set goals to be more organized in 2020. Being organized is a journey. To expect to become completely organized this month if you have not been organized in the past year or decade is unrealistic. Setting small weekly goals to get your home organized will be more manageable, leave you time to continue with your daily activities, and allow you to celebrate many small victories.
5 W’s of Goal Setting
Take some time to think about the benefits of being organized, and what that will look and feel like for you. Start a journal or notebook to track your progress, motivations, slowdowns and feelings. A good guideline for setting goals is to look at the five W’s.
- Why is it important for you to become and stay organized? How will this help you to be the best you?
- Where do you think you need the most organization? Is it an area of your home? Is it an area of your office? Would having more structure to your schedule be beneficial?
- When will you accomplish your goals? When will you make time to work on your goals? Set a realistic time frame to meet your goals. Getting organized is a journey, not a one-stop trip. Plan time in your days and your weeks to accomplish small goals.
- Who will be affected by being organized? Obviously you will directly benefit. Think about the other people who will positively benefit from organization and structure. Your boss will feel the benefits of your workspace being organized and your schedule more structured. Family members will see the benefits of an organized home and feel the benefits of you being less stressed. Relationships will flourish when this area of your life is under control.
- What do you want to organize? Look at the big picture and break it down into small steps and then into even smaller steps. If you want your entire home, office, storage unit, garage, attic and vacation home organized, you will need to set goals in each area. Furthermore, goals will need to be set for each room, and then even smaller goals will need to be set for each file, drawer, closet, box and bin. For example, if your goal is an organized bedroom, you will want to break your bedroom down into smaller categories. These smaller categories could include closet, dresser, under bed storage, bathroom and linen closet. Each of these areas can be broken down into very small projects that take just minutes. Your dresser can be separated into smaller categories such as undergarments, socks, pajamas, swimwear, t-shirts and accessories. A similar method can be applied to other areas.
Goal Setting Basics
- Specific
Be specific about your goals. Goals should be specific to what you really want and need to be organized. Go further than general statements like “I am going to get organized” and “I am going to organized my whole house.” Specific goals will go deep and detail areas of your home, and further into rooms, and then into drawers, closets, categories, boxes and bins.A calendar is a great way to break down your project into small specific goals. Each month you will have a large goal. The large goal can be broken down into smaller weekly goals, and then even further into very manageable daily goals. The smaller goals should be focused on achieving a larger goal to ensure a part of the project gets completed. If you are working on basement organizing, the smaller goals should lead you to accomplishing that larger goal.
- Measurable
You will want to have a way to measure your progress. Progress with getting organized can be a photo to visually remind you of what you have accomplished. It will help to know where you started and how far you have come. A simple check list or spreadsheet can also help you mark off your progress.
- Attainable
Set goals that you can achieve. Success meeting your goals will motivate you to keep going. Setting goals that will only take minutes a day will be more attainable than goals that take many hours out of your week. An attainable goal for you may be cleaning and organizing a refrigerator shelf, not the entire refrigerator. It will always feel better to move on to the next small goal when you have time than to set goals so large you cannot complete even one.
- Realistic
Be realistic about your time, lifestyle and goals. If your weekends are packed with running to activities and enjoying time with family and friends, you may only have a few minutes to work on your goals. Don’t plan to organize your entire office on Saturday if you have a full schedule. That will only lead to failure and frustration.
- Timely
Set timely organizing goals. Making progress will keep you motivated. If you plan for an organizing project to go on too long, you may lose focus. Planning your goals to be accomplished in a timely manner will help you and others see and learn that progress has happened and keep you going.
There are many monthly and daily organizing calendars available online. These can provide a great guide for you to plan your organizing journey. Top Shelf Home Organizing would love to help you on your journey. Jayme would be happy to help you set your organizing goals, and help you achieve your organizing goals.
by Jayme Radomski | Dec 6, 2019 | Clutter, Relationships, Holidays
 Year after year, you want to get all your holiday stuff organized completely. At the end of the holidays you are tired, life gets back to usual busyness and holiday items quickly get stashed away. Here are Top Shelf Home Organizing’s tips to get your holiday items organized and packed away properly. Organizing holiday items really is not different than organizing any other category of items in your life. Gather, sort, purge and store.
1. Gather
Retrieve all items from storage including the attic, basement and storage unit. Gather all items that were put on display this year. Unwrap, touch and hold each item.
2. Sort
Sort each piece into categories:
- Tree Décor
- Interior décor by room
- Exterior décor
- Holiday cards received
- Food storage
- Other
Within each of these categories, you will sub-sort items as:
- Used this year and will use again
- Used this year, but will not use again
- Did not use this year, but will use next year
- Did not use this year and I never want to use these (this includes defective lights and broken items)
- Do not use these and will not use next year, but they are family heirlooms, I must keep these items forever
3. Purge
Remove the items you have classified as “Did not use this year and I never want to use these,” and “Used this year, but will not use again.” These items can be donated, offered to friends and family or potentially recycled and disposed of.
4. Store
After the sort is done, plan for storage. Create ample space in one location to store holiday items. This is when you purchase storage containers and shelving if needed. Clear, small- to medium-sized containers that stack and nest well, work great for these delicate items. A shelf dedicated to holiday décor keeps these items organized and together. These items are readily available at most home goods stores immediately after the holidays.
Keep track of your categories created. Items should be stored and labeled in the same manner to keep next year’s decorating as simple and organized as possible. Holiday lights can be neatly wrapped individually for ease of install next year. Ornaments are carefully wrapped and stored. Carefully pack up the family heirlooms that you want to keep, but will not necessarily display often.
Top Shelf home Organizing loves to organize holiday décor. Contact Jayme to see how Top Shelf can help.

 Winters are long and hard in the Midwest. So how about tackling some quick and simple organizing projects on the long, cold days to beat the winter blues? We put together a quick list of projects you can have ready to blast through on the next snow day.