by Jayme Radomski | Dec 4, 2020 | Clutter, Organizing
 Winters are long and hard in the Midwest. So how about tackling some quick and simple organizing projects on the long, cold days to beat the winter blues? We put together a quick list of projects you can have ready to blast through on the next snow day.
Simple organizing rules apply to anything you are organizing: gather, sort, purge, organize and label. Have a rag and cleaner ready to wipe down the area after it is emptied out before you organize and label. Sort by category to get a clear understanding of what you have and what you can purge. When organizing and labeling, use clear containers with labels and keep items in their categories. This will help keep the area organized and inventory under control.
1. Craft closet
Gather all craft items into one area. Sort the items by category. Purge items that are not useful (scraps, dried products, dull scissors). Organize the items and use fun labels to inspire creativity.
2. Game closet
Pull all games out of the area. Reassemble games with loose pieces and cards. Give a little TLC to damaged boxes with some strong packing tape. Sort games into age categories. Remove any games that no longer interest your family or games they have outgrown. Organize the games by category and include labels for simple replacement.
3. Pantry
This is a great project for any season. Remove all items from the pantry. Sort by category. Remove any old, spoiled, or expired food. Donate food that is unopened, not expired, but not wanted. Find a new home for any non-food and non-kitchen items. Keep all food in the same pantry or area of your kitchen. Categorize your food into grains, pasta, soup, fruit, vegetables, snacks, lunch items, etc. Utilize clear bins with labels to help keep food in their categories and help you identify items you are getting low on.
4. Storage Containers
Gather all storage containers and lids. Pair up the containers with lids. Recycle containers or lids that don’t have a partner. Organize containers by size and nest them together if possible. Keep a reasonable number of containers. Excess containers make staying organized a challenge. Place storage containers in an easy to reach location and label the shelves. Having to bend over or reach too high is an invitation for this category to become messy again.
5. Sock Drawer
Socks are a quick and satisfying project. Like any other category, you’ll gather all socks and put together pairs. Make sure you have your socks from the laundry hamper washed and included in this step. You may choose to fold or ball them together or roll them up. Remove the socks that don’t have a partner, have holes, have failed elastic or the socks that you don’t like to wear.
6. Refrigerator
Place all items from the refrigerator onto your countertop. Wipe down the shelves, drawers, gaskets, and door. Toss food that is expired, spoiled, and unwanted. Categorize the food into categories such as fruit, vegetable, dairy, condiments, lunch, leftovers, etc. Deep, clear bins with labels may help keep items in their categories. Place items back into the fridge in their categories. You may need to adjust some shelves based on the size of your items.
7. Freezer
Organizing the freezer is just like organizing your refrigerator. Empty the freezer and wipe down all the surfaces. You may need to complete a quick defrost. Categorize the food items from the freezer into categories such as vegetables, fruit, desserts, prepared meals, meat, etc. If you have a large freezer, you may want to write down an inventory. A formal inventory will help you with meal planning and inventory control. Toss any food items that are expired or have gone bad. Consider clear freezer bins for the loose items. When returning the food to the freezer, keep the older items closer to the front and new items to the back for first-in, first-out inventory control.
8. Winter gear
Gather and sort all winter gear by the person and then by category (glove, hats, scarves, face masks, etc.). Inspect for holes, tears, wear, and damage. Donate items that are still functional, but may no longer fit your size or your style. Use bins or an over-the-door, clear organizer to keep everyone’s gear organized by person and category.
9. Photos
Grab a box of photos from the basement or a file from your computer. Sort through the photos and place them into chronological order. Remove any photos or photo files that are duplicates or don’t display a picture you want to keep. Tag people in the photos for future reference. This can be done with a photo-friendly pen on the back of physical photos. Use index cards or subfolders to identify special events within the photo box or file folder. Clearly label the photo box or file folder with the date range of the photos and any major events that are included.
10. Books
There are so many ways to organize books. Keep this task simple by gathering all your books into one area. Categorize your books into categories that you would use to retrieve them (cookbooks, reference books, professional development books, mystery books, children’s books, etc.). Donate books that no longer interest you. Place books by category to an area where you use them or on a central bookshelf. Use labels, if it will help family members remember where to replace books when they are done reading them.
11. Spice cabinet
Gather all the spices from the spice cabinet and other areas of the kitchen. Categorize the spices by name. Toss spices that are old. Many spices now have an expiration date, or you can use the one-year rule of thumb. Place spices back into the cabinet in alphabetical order, reserving the front and center for the few spices (and seasonings) you use most frequently such as salt, pepper, cinnamon, etc. You may want to consider a riser or bins to help keep spices organized and visible. Labels can also help quickly identify if a spice is in stock.
12. Linen closet
Gather and sort all items of the linen closet into categories. Pair down and donate excess items. Remove items that are cluttering up space such as seasonal items and items with limited use (beach towels, humidifiers, extra hair dryers). Neatly fold items and use clear bins for toiletries and other loose items. Label shelves for easy retrieval and replacement.
13. Office supplies
Gather and sort all office and school supplies in one central area. Use clear bins and containers to organize items by category. Store all the items in one common area so family members know where to go for supplies, know where to replace them when done, and to keep a good inventory. Be sure to label all categories.
14. Media cabinet
Tackle your media cabinet by removing all items and wiping down all surfaces. Straighten and organize cords and cables. Categorize all movies and music CDs if you still have physical media. Gather gaming devices and gadgets, and place them into a bin. Place all categorized items back into the cabinet and label.
Refresh your mood and your home with these quick organizing projects. Just a little bit of organizing can take your mood a long way. Select projects that fit the time you have so you can feel accomplished and complete. Jayme at Top Shelf Home Organizing would love to guide you through your organizing journey. Let’s talk!
by Jayme Radomski | Nov 23, 2020 | Organizing, Work & Home Office
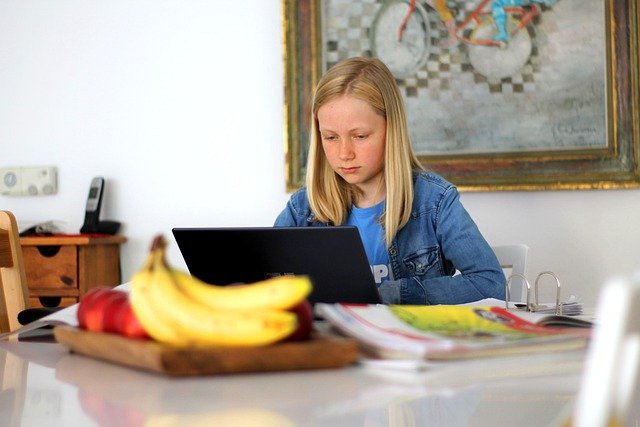 Transitioning from in-person learning to remote learning can be exciting and challenging for families. Setting a plan and expectations can help this transition when it occurs. Four areas that you can help organize for your learner include the daily schedule, location of learning, learning supplies, and learning materials.
1. Schedule
Know, print, post, and set the schedule for the day. To ensure punctual attendance to synchronous class time, the class schedule needs to be known. Schedule class times into your and your child’s calendar with a reminder. Print and post the daily schedule in your child’s workspace, your workspace, and at the family command center. This can help keep everyone on schedule.
2. Location
Help your learner select a good location for learning at home. A space that is quiet, well-lit, promotes creativity and productivity. For some learners, they may focus well sitting at the kitchen table. Other learners may need a secluded place to effectively learn. You may need to consider a station in a bedroom or other less traveled space.
Doing a quick declutter of the learning space will help with focus and productivity. If learning is happening in their bedroom, have your child make their bed, place dirty laundry in the basket, and limit the toys and distractions in the space. The same concept applies to the dining room, kitchen, and learning nook. Your student may need to change locations throughout their workday. A change of scenery, lighting, and distractions is good. Maintain a consistent location where they will keep their supplies and materials.
3. Supplies
Equip your learner with the supplies they will need to complete their work. These materials are very similar to what they have available at school. Ask your child and your child’s teacher what supplies they use daily at school. Have a simple selection of these materials at your learner’s workspace. Keep in mind their age and learning level. A young learner may need some sharp pencils, an eraser, a selection of markers, and some paper. An older learner may need a calculator, paper, charging cable, a mouse with extra batteries, and a headset to keep their day going.
A printer, stock of extra ink, and paper will also be necessary when physical documents are needed. Make sure everyone’s computers and learning devices are set up to the Wi-Fi and printer before the day begins. Remove any extra supplies that may act as a distraction to learning.
4. Materials
When learning transitions to at-home, learning materials will need to be prepared and available. Teachers may share the learning materials with you and/or your child.
Have the materials available and ready to go in the workspace by the start of the workday. This will help avoid frantic searching for materials or bottleneck backups at the printer throughout the day (you know this is when the ink runs out and the paper jams). Classroom learning links should be open and waiting on internet browsers to ensure timely attendance to meeting times.
Being prepared and having a plan for a shift to, or from, remote learning can help your learner succeed through the transition. Organizing these four areas, schedule, location, supplies, and materials will help with effective learning from home.
If creating a workspace is overwhelming for you and your learning, Top Shelf Home Organizing can help. Jayme would love to talk about creating a learning space in your home.
by Jayme Radomski | Oct 22, 2020 | Busyness, Clutter, Managing Time, Organizing, Productivity, Saving Time
 I was recently asked by an organization I belong to, to share my inspiration to start a business. I then realized what a better audience than all of you to share that inspiration with, as well.
Top Shelf Home Organizing started in 2014 after having a discussion with friends about what our dream job would be if we could do anything. After watching all their jaws drop when I said I would organize people’s closets and basements, I knew there was a need. Since then, my business has been effectively helping people organize their homes and offices, simplify their routines, and clear their schedules. I am personally involved in all projects and have six wonderful ladies that help on various projects.
We help busy families with projects that range from pantry organizing projects to full-home, plus storage units. Some individuals just need the accountability to get through an organizing project, and others need full-service help where we handle the complete organizing project.
I have always had a bit of an entrepreneurial mind. Going back to babysitting jobs, waiting tables, and working as a consulting engineer, I always tracked the time I spent on a project, the revenue each project brought in, how my job could be done more efficiently, and what types of projects brought the most value. I treated projects like my own little business.
After 15 years of professional experience working in various leadership roles, I knew it was time to do something I was passionate about. My youngest of four kids was about six months old, and I was in the thick of balancing parenting and a career. So I knew my skill set would be valuable to other busy professionals.
My favorite part of Top Shelf Home Organizing is the clients. It can be a very personal thing helping them to organize their home, basement, or closet. I often hear stories from their childhood, past careers, current life struggles, and their aspirations. It is not uncommon to get a message from a client on a Sunday afternoon asking how my kids are, how big our puppy is, or asking for a recommendation on a carpenter, decorator, or just a simple hello. Clients become friends.
If you want to learn more about Top Shelf Home Organizing or just want to chat about an organizing project you have going, you can find me at:
Phone: 262-373-9416
Email: jayme@topshelfhomeorganziing.com
Web: topshelfhomeorganizing.com
Facebook: https://www.facebook.com/topshelfhomeorganizing
Pinterest: https://www.pinterest.com/TopShelfHomeOrg/
Instagram: www.instagram.com/jaymeradomski
by Jayme Radomski | Sep 8, 2020 | Organizing
A simple closet that functions well is easier for a child to maintain than a complex, overstuffed closet. We consider the closet size, items in the closet, and implement simple solutions for kid-friendly closet organization. We share our secrets with you, so you can keep your kids’ closets neat and tidy.
 Keeping a kid’s closet organized comes down to four considerations:
1. Size
Consider the size of the closet when determining how to organize. A small closet will need to be supplemented with a chest of drawers and hooks on a wall. A large closet can actually make the extra storage furniture in a room unnecessary, as most clothing items and accessories should fit. Be real about what can fit in the closet neatly and remove the rest. Lots of hanging space versus many shelves will allow for more items to fit. If you can hang all pants, tops, dresses, t-shirts, and leggings. Socks, undies, swimwear, and shorts can be stored on shelves or in bins.
2. Remove
Bedroom closets are for clothes. Unless you have an abnormally large closet, the toys will have to find a new home outside of the closet (and bedroom). Other family members’ clothes can also be removed. Keepsakes can make their way into storage. Allocating a closet to only clothes will simplify the organizational system and make retrieval and replacement of items clear and simple.
3. Relevant and Current
A child’s closet should house clothes that are relevant to their size and style. Outgrown clothes that are being saved for another family member can be stored in a clear bin with a label, in a storage area. If you have clothes that the child does not yet fit in, also place those in a clear bin with a label, in a storage area. Keeping only current and relevant times will help keep the closet practical.
4. Keep it Simple
Did we already mention this? Yes, keep the closet simple. Hang as much as you can. It is easier for a child to maintain tidiness when it is easy to see. The items a child wears frequently should be placed within reach so the child can access easily. If your child wears a uniform to school, place those on a lower rod. If you child wears athletic clothes to school, those should be front and center.
When items require a bin or drawer, don’t stuff them full. Leave plenty of room so the items can be seen. File or roll the clothing versus stacking, so items can be seen. The easier it is to see the items, the less likely a child will rummage through them and create a mess. Lesser-used clothes can be placed higher on the rods and shelves. Off-season items that still fit your child can be placed on the top shelf with a label.
Follow these simple rules to help your child keep their closets neat and tidy.
We can help!
If removing items and visualizing storage solutions are too time-consuming or overwhelming for you, Top Shelf Home Organizing is happy to work with you. Contact Jayme for some great ideas on keeping your kid’s closets neat and tidy.
by Jayme Radomski | Aug 5, 2020 | Organizing, Productivity, Work & Home Office
Learning and working from home are most productive when you are prepared. Here are three tips to help your home become an area of productivity and focus. These tips include the proper supplies, a thought-out workspace, and a consistent schedule. Here are some details on creating the most productive workspace your home can provide.
Supplies
 Have the appropriate supplies available for completing professional and academic tasks. A basic school supply list is a great starting point. Be sure to have extras for when the crayons break, the ruler is misplaced, the printer runs out of ink and erasers fall off the pencils. Also, consider electronic supplies such as a calculator, headphones, and charging cables.
Organize Supplies by Type
Organize the supplies by type so they are easy to locate and easy to put away. Open cups or containers work great for pencils, pens, markers, etc., because you can take the entire container to your workspace and grab as you need. Label all containers, shelves, files, and areas that house school supplies. Follow the “place for everything and everything in its place” rule. Even the most obvious storage location should have a simple label.
Keep Supplies Simple
Keep the supplies simple. A fresh box of crayons, matching pencils that are freshly sharpened, a simple set of markers will make it easy for students to select the appropriate tool without overstimulation. A simple, clean file system and basic notepad will keep professional tasks organized. Store supplies in a location that is convenient for everyone to use and put away. If there are young learners, place supplies in an area that they can reach. Older learners will also need a convenient location too, that retrieval and replacement are mindless. The proper supplies will keep your home a well-supplied environment for productivity.
Work Space
Workspace Lighting
A well-thought-out workspace makes working and learning at home possible. Space will need to have good lighting, be well organized, have space to think, and have minimal distractions. The lighting of a workspace is very important to aid in productivity and alertness. Natural light is important for mental well-being. In the darker, winter months, lamps, and lighting with a warm light can help students feel alert while putting less stress on their eyes. Select a work area that has the best lighting for learning and working.
Organizing and Setting Up Work Space
Keeping a workspace organized will foster learning from home. Students will know where to find what they need to complete their work. The consistency of an organized workspace will also foster learning and reinforce a stable learning environment.
Work areas should have open space on the walls and on the floor to encourage creativity and thinking. While a good selection of wall art and learning posters will create a fun work area, a complete covering of the walls may create overstimulation and distractions. Limit the number of distractions in a work environment. If there are multiple people in the house, try to create smaller work areas for times when independent learning and working is necessary. The workspace should be separate from areas where there is a lot of traffic, younger children may be playing, or where adults will be on calls. Creating a productive workspace is a mix of art and science. Remember to keep it simple and clear for productivity.
Scheduling with Time Blocking
A consistent, time blocked schedule will help you stay focused and be the most productive at home. For adults and children, a consistent schedule is key. Keeping consistency day-to-day will help keep everyone focused on the tasks for the day. When creating a daily time block, you will dedicate each period of the day to a specific category.
What to Include in a Time Block
Time blocks include self-care such as sleep, grooming, exercise, fresh air, and breaks. The work and school day can be blocked out by subject or work tasks. However, meetings and face-to-face time with colleagues, teachers, and teams, may not have much flexibility, so your workday time block may be created around these meetings. There will need to be an end time for your work and school day. The end time gives everyone a time limit to their work and will encourage focus and productivity during work time. Your time block will also need an allocation for meals and meal preparation. Allowing enough time for meal preparation or planning will help keep the day on schedule. Allow for take-out and convenience meals occasionally, so this task doesn’t flood your schedule. The time block schedule should also allow for any housekeeping, yard work, and cleaning, as these are equally important tasks to keep your home a productive environment.
A general time block day that simplifies the details and includes only sleep, self-care, school/work, and family time is completely acceptable. You may personally want to include more details in your time block such as exercise, meetings, planning, etc. Keep it simple when working with the family as a whole. A consistent schedule that is communicated to everyone will promote productive work at home.
Whether your family is working from home full-time or part-time, a well-planned environment will reduce stress and encourage productive work and learning. Take time to select the proper supplies, plan out workspaces, and create a schedule. These three areas will help make working from home as productive as it can be.
Need help?
If planning and organizing are a challenge for you, Top Shelf Home Organizing can work with you. Contact Jayme if you want help setting up for a productive home.

 Winters are long and hard in the Midwest. So how about tackling some quick and simple organizing projects on the long, cold days to beat the winter blues? We put together a quick list of projects you can have ready to blast through on the next snow day.
