by Jayme Radomski | Dec 11, 2023 | Cleaning, Clutter, Cooking & Kitchen, Eating & Kitchen, Organizing
Organizing certain aspects of your life before Christmas can help ensure a smoother and more enjoyable holiday season. Here are six things you might want to consider organizing right before Christmas.
- Make a list of people you need to buy gifts for.
- Set a budget for each person.
- Purchase or make the gifts well in advance.
- Set aside time for wrapping presents. Organize wrapping paper, ribbons, and tags.
- Check your holiday decorations and assess if anything needs to be replaced or replenished.
- Organize decorations by theme or room.
- Set a day to decorate your home, involving family members if possible.
- Plan your Christmas menu, considering dietary restrictions and preferences.
- Create a shopping list for all the ingredients you’ll need.
- If you’re hosting a gathering, organize seating arrangements and any potluck contributions from guests.
- If you’ll be traveling for the holidays, organize your travel plans well in advance.
- Confirm reservations for accommodations, flights, or any other transportation.
- Make a packing list to ensure you have everything you need.
- Plan a deep cleaning of your home before the holiday season.
- Declutter common areas and guest spaces to create a welcoming environment.
- Ensure that necessary cleaning supplies are on hand.
- Create a shared family calendar to keep everyone informed about holiday events and commitments.
- Coordinate schedules for family gatherings, parties, and other festive activities.
- Plan for any special traditions or activities you want to include.
Remember, the key to a stress-free holiday season is preparation. By organizing these aspects of your life before Christmas, you can create a more relaxed and enjoyable atmosphere for yourself and your loved ones.
Remember that being organized is a process, and it’s important to approach it at a pace that feels comfortable for you. Start small, plan one event at a time and develop systems to maintain organization. Gradually, you’ll experience the positive impact and being organized will come naturally. If organizing is daunting task, the professional organizers at Top Shelf Home Organizers are happy to help. Contact Jayme for a consultation.
by Jayme Radomski | Jul 10, 2023 | Cleaning, Clutter, Organizing, Productivity
Have you ever felt overwhelmed walking into a messy house after a long day of work or felt suffocated walking into your kid’s bedroom? There is a reason a messy, cluttered home is stressful. Having an organized home can have several positive effects on your mental health. Here are some reasons why:
Clutter and disorganization can contribute to feelings of stress and overwhelm. When your home is clutter-free and well-organized, it creates a calming and peaceful environment. It allows you to easily find what you need and minimizes the time and effort spent searching for things, reducing stress levels.
An organized home can enhance your productivity and focus. When everything has its designated place and is easily accessible, you can accomplish tasks more efficiently. A tidy environment helps you stay focused and prevents distractions, allowing you to concentrate on important tasks.
A cluttered home can lead to mental clutter. It can be overwhelming to have a constant visual reminder of unfinished tasks or disorganized spaces. By decluttering and organizing your home, you create a clear and ordered space that can promote mental clarity and reduce mental fatigue.
Living in a tidy and organized environment can positively impact your mood. A neat home can evoke a sense of pride, accomplishment, and satisfaction. It can also create a visually pleasing atmosphere that can boost your mood and create a sense of calm and harmony.
Your home environment can significantly affect your sleep quality. An organized bedroom free from clutter can create a serene and relaxing atmosphere that promotes better sleep. When your bedroom is organized, it becomes easier to unwind, both physically and mentally, leading to improved sleep patterns.
Having an organized home gives you a sense of control over your environment. It can provide a feeling of mastery and empowerment, as you are able to manage and maintain your living space effectively. This sense of control can translate into increased confidence and overall well-being.
Living in a chaotic and disorganized environment can contribute to feelings of anxiety. The uncertainty and constant visual reminders of unfinished tasks or clutter can be overwhelming. Organizing your home can create a sense of order and structure, reducing anxiety and promoting a sense of calm.
Remember that organizing your home is a process, and it’s important to approach it at a pace that feels comfortable for you. Start small, declutter one area at a time, and develop systems to maintain organization. Gradually, you’ll experience the positive impact it can have on your mental health. If organizing your home is daunting task, the professional organizers at Top Shelf Home Organizers are happy to help. Contact Jayme for a consultation. This article was written in collaboration with our friend, OpenAI.
by Jayme Radomski | Apr 3, 2023 | Clutter, Organizing
Whether you are a neat and tidy person or more of a free spirit, there are benefits to being organized. Educated as an engineer, I know I don’t know anything about the medical field. What I do know is how getting organized has health benefits. All of the busy people we have worked with have reported the following benefit of getting their homes and offices organized:
Having clutter drains energy. Stagnant energy builds up around clutter and causes tiredness and lethargy.
People with limited clutter look and feel better. They are typically more active and have a fresh face. Clutter congests your home and your body.
Stagnant energy surrounding clutter pulls you down. Feelings of hopelessness can be relieved by clearing the clutter. Clearing the clutter allows you to make room for something new and fresh.
When you are organized:
You’ll be able to relax more
You’ll have more time for yourself
You’ll have more time for your loved ones
You’ll feel good about your environment
You’ll be an even better role model
You’ll be healthier, as well as your family
You’ll breathe better
You’ll do better professionally
You’ll save more
You’ll achieve more
Organizing is a process, not a destination. Top Shelf Home Organizing can help you on your journey. Let’s chat about how Top Shelf Home Organizing can help you feel the benefits of getting organized.
by Jayme Radomski | Mar 9, 2023 | Clutter, Organizing
JAYME RADOMSKI
Owner and Organizer
Jayme has a passion for developing efficiencies, systems and organization for busy people. As a child, organizing toys and craft items was fun. As the neighborhood babysitter, families always came home to nicely organized kids’ spaces and rooms. Jayme looks forward to making an enormous change in your home, office and life. She has degrees in engineering and business management. Attention to detail and passion for helping others led to leadership roles in Jayme’s engineering career. In the past she designed commercial fire suppression systems, and spent years in retail and restaurant industries while in college.
JACKIE L.
Organizer
Jackie is the ultimate organizer for busy families. As a mom of four active children, she knows the importance of keeping a busy family organized. Jackie understands the functionality of kitchens, she knows and understands all the kids toys, and is a whiz at closets, basements and garages. You will love to see Jackie’s wisdom and talent in action.
SUSAN K.
Organizer
Susan made her way into professional organizing after many years as an IT Project Manager. She enjoys helping clients streamline their home and work spaces so they can spend time on the things that matter most to them. For Susan, it’s collaborating with clients to identify their needs, and then devise and execute organization projects. Nothing beats seeing the “after” of a space that was previously a source of client discomfort and distraction! Susan is a champ at making decisions and keeping projects moving forward.
by Jayme Radomski | Feb 7, 2023 | Clutter, Digital, Money & Paper Management, Organizing, Work & Home Office
Are you stressed by unmanaged paperwork around your home and office? Searching for important documents may seem hopeless. Interest charges and late fees can pile up quickly on misplaced bills. Deadlines are easily overlooked. Getting on top of your papers and developing a good paper management system will reduce stress. Here are some tips on how to get your paperwork organized, and regain control of your home and office.
Where you manage your paperwork should be convenient. Going to a secluded area of your home may not encourage you to manage your paperwork. If it is not an area you enjoy being in, you won’t go there.
The workspace should have ample surface area, basic office supplies (envelopes, pens, address labels), computer and printer, paper recycle bin and shredder.
Remove the
unnecessary, immediately
Sort your mail as soon as it comes in, with a recycle bin and shredder within an arm’s reach. Junk mail should be recycled immediately. Refer to a document retention guideline for guidance on what documents to keep and for how long.
Create a temporary, simple filing system for the initial sorting of your paperwork. This file system could include files labeled:
File – for files to be filed
Pay – for bills to be paid
To Do – for items that require attention within the next month
Read – for documents that will required your dedicated attention
Regularly go through and pay, sort and file
Set up a weekly time to go through the temporary files. Coordinate your bill paying with your pay dates. File papers from the ‘File’ file. Review your ‘To Do’ file for items needing attention within the next week. Take some time to read through the files from your ‘Read’ file.
It is important to always be aware of what papers, documents and receipts enter your home. Receipts can be sent via email or not retained at all. Be selective of what documents are collected at trade shows, conventions and seminars. Only accept the documents that are relevant to you. Be mindful of the mailing lists, marketing emails and promotional lists you sign up for.
Once your paperwork system is set up, plan to set aside time every week to maintain and manage your paperwork. Staying on top of your system will reduce stress and ensure you keep on top of your work and bills.
If setting up a paperwork management system is overwhelming, a professional organizer can help you started or guide you through the entire process. Top Shelf Home Organizing takes pride in working with people to organize and streamline their paperwork. Reach out to Jayme if you are ready to get your paperwork organized.
by Jayme | Feb 8, 2022 | Clutter, Cooking & Kitchen, Eating & Kitchen, Organizing
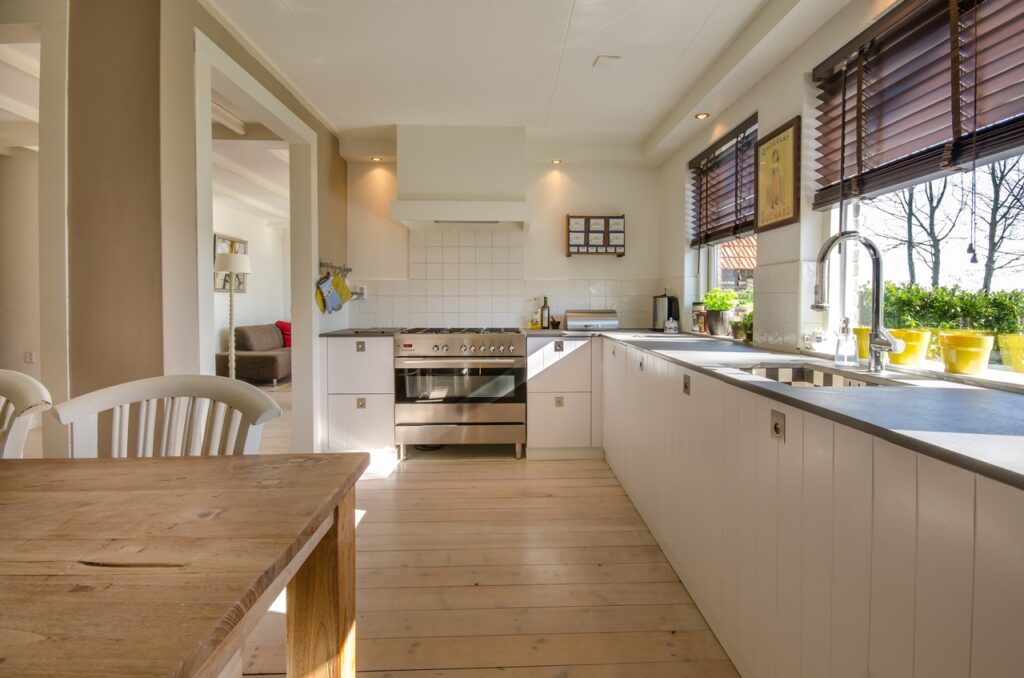 The new year is in full swing. Healthy eating and conscious kitchen choices are likely some of your new year’s goals. This month, we offer ideas on the 14 best areas to focus for decluttering and organizing your kitchen. Every day or two this month, declutter and organize your kitchen by breaking it down into small categories. You will feel a revised focus on your healthy eating goals.
1. Baking dishes
Gather, sort, and evaluate all your dishes intended for baking. Simplify your inventory to the most practical items. Replace items that have lost their non-stick finish, are starting to rust, are starting to warp, or are only used on rare occasions.
2. Seasonings and spices
Pull out all seasonings and spices. Purge those that are expired, lack aromatics, are hard, or will not be used. Inventory what you have in writing, and make a list of what you need to replenish.
3. Coffee mugs
Mugs can consume a large amount of real estate in a kitchen. Consider the number of people in your home that use mugs and how often they are used. Simplify the quantity of mugs to what is practical in your kitchen.
4. Water bottles
Water bottles also take up a lot of space in a kitchen. Limit the quantity of water bottles to the number of people in your house. Bottles that require handwashing, have difficult spouts, tend to leak, or are not popular should be purged.
5. Freezer
Dig deep, inventory your kitchen freezer and deep freezer. Purge items that are old, smelly and show freezer burn. Meal plan around the freezer food you keep to reduce inventory and save money.
6. Formal entertaining dishes
Realistically examine the formal dining and service dishes you need to have on hand. Keep a practical set for a typical gathering. Reconsider if you need specific dishes for a specific holiday.
7. Bar glasses
A general set of tumblers, wine glasses, and pint glasses work well for most cocktails. Ditch the narrowly defined glasses that take up room in your cabinet.
8. Glasses
Reduce your daily glassware to what you use in a day. Every souvenir glass you have collected during your life likely doesn’t fit in your kitchen. Stick to the drinking glasses that are practical for your household and lifestyle.
9. Storage containers
Storage containers have a history of reproducing while you are not looking, and then ditching their partnering lid or base. Gather all storage containers, match up sets, and remove the misfits. Storage containers also take up a large area in your kitchen, so it is important to keep them under control.
10. Specialty gadgets
Avocado slicers’ and pepper storage containers might be fun gift items. But these specific, specialty items that are rarely used take up a lot of space. Consider more multiuse gadgets that are practical and don’t use up your precious kitchen space.
11. Small appliances
So many appliances for so many creative kitchen uses are available. The ideas are unlimited. Small appliances can be economical and practical if they serve more than one purpose and are used more often than once per year.
12. Disposable dishes and flatware
Disposable dishes and flatware from takeout and past parties may be taking over a cabinet in your kitchen. Gather all these items and intentionally plan to use them up. The kids will love having their breakfast on some cute happy birthday plates.
13. Snacks
The pantry likely has a collection of opened bags of snacks and crackers, and an inventory of candy from the past holiday. Get all of the snacks and candy together. Purge those that are stale, old, and completely unhealthy. Use up any opened snacks for your next family movie night. Keep the candy on hand for special treats and rewards for good behavior (if you decided to keep any).
14. Condiments
Condiment packets from school lunches and take out may be filling a drawer in your kitchen. Reduce the amount of condiment packets. Gather them all together, throw out any old condiments, keep a small selection of condiments you would use, and donate all the extras to a food pantry.
Now it is time to get started!
Take this month to work through your kitchen and remove the stuff that doesn’t meet your needs and takes up your limited kitchen space. Take the project category by category. It will keep you focused and it doesn’t require a large block of time.
If organizing your kitchen is overwhelming, Top Shelf Home Organizing would love to help. Contact Jayme for more inspiration.

